
Hoover Repair Manual: A Comprehensive Guide
This detailed manual empowers owners to tackle Hoover repairs, offering troubleshooting, parts information, and step-by-step guides for optimal performance and longevity.

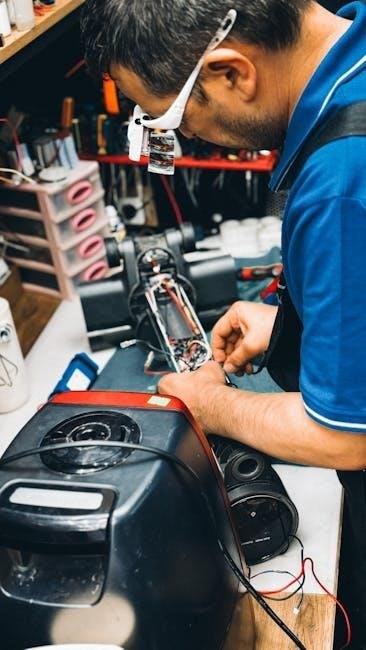
Embarking on Hoover repair can seem daunting, but with the right guidance, it’s achievable for many homeowners. This section introduces the fundamentals of diagnosing and fixing common issues. Understanding your Hoover’s mechanics, coupled with a methodical approach, will save money and extend the life of your appliance. This manual provides a detailed overview, ensuring successful repairs and continued cleaning power.
Understanding Hoover Models
Hoover offers a diverse range of models, each with unique characteristics and potential repair needs. Familiarizing yourself with the specific design of your Hoover is crucial before attempting any fixes. Variations exist in motor types, filtration systems, and component layouts. Identifying your model accurately ensures you use the correct parts and procedures for a successful repair.
Identifying Your Hoover Model Number
Locating your Hoover’s model number is the first step towards effective repair. This unique identifier unlocks access to specific parts diagrams and troubleshooting guides. Typically, the model number is found on a sticker located on the underside of the unit, or near the dust container. Record this number before ordering parts or seeking assistance.
Common Hoover Model Series & Their Peculiarities
Hoover offers diverse model series, each with unique repair considerations. WindTunnel models often experience belt issues, while Tempo series are prone to brush roll malfunctions. The Platinum series may require specific motor component replacements. Understanding these commonalities streamlines diagnosis and ensures you order the correct replacement parts efficiently.
Essential Tools for Hoover Repair
Successful Hoover repair demands a well-equipped toolkit. Beyond basic screwdrivers and pliers, a multimeter is crucial for electrical testing. A nut driver set simplifies disassembly, while specialized Hoover belt tools are invaluable. Don’t forget safety glasses and a work light for clear visibility during intricate repairs.
Basic Hand Tools Required
A solid foundation of hand tools is essential for most Hoover repairs. This includes a Phillips and flathead screwdriver set, pliers (needle-nose and standard), adjustable wrench, and a utility knife. A rubber mallet proves useful for gentle persuasion, and a small brush aids in cleaning components during disassembly and reassembly.
Specialized Tools for Hoover Repairs
Beyond basic tools, certain repairs demand specialized equipment. A multimeter is crucial for electrical testing, while a nut driver set simplifies fastener removal. A belt removal tool assists with belt changes, and a vacuum tester identifies suction leaks. Consider a crevice tool for reaching tight spaces and a brushroll cleaning tool.
Safety Precautions During Hoover Repair
Prioritize safety during all Hoover repairs! Always disconnect the power cord before disassembly to prevent electric shock. Wear safety glasses to protect your eyes from debris. Handle sharp components carefully, and avoid working on a damaged power cord. Proper ventilation is key when dealing with dust or fumes.
Electrical Safety Guidelines
Always unplug the Hoover before any electrical work! Never attempt repairs with wet hands or in damp environments. Inspect the power cord for damage – cracks or exposed wires are immediate red flags. If replacing the cord, use a properly rated replacement. Test for continuity with a multimeter before reconnecting.
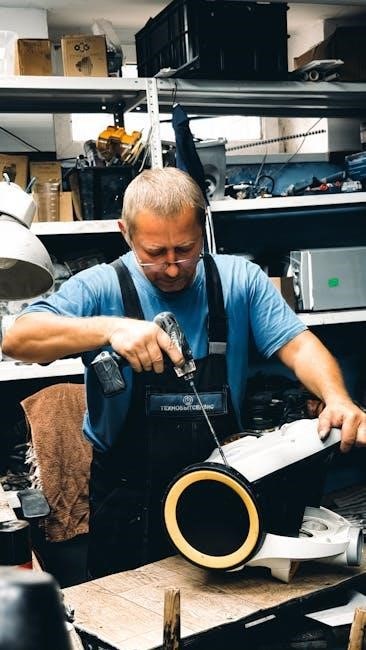
Disassembly & Reassembly Safety
Take photos during disassembly to aid reassembly – it’s a lifesaver! Keep track of all screws and parts, labeling them if necessary. Avoid forcing components; if something resists, re-examine the steps. Ensure all parts are securely reattached before powering on. A rushed job can create hazards.
Troubleshooting Common Hoover Problems
Diagnosing issues starts with observation. A Hoover that won’t turn on may have a power supply problem or a tripped circuit breaker. Loss of suction often indicates a clogged hose or full dust container. A non-rotating brush roll suggests a belt issue or motor fault – systematic checks are key!
Hoover Not Turning On
Begin by verifying the power cord connection and checking the circuit breaker. Inspect the power cord for damage, and test the outlet with another device. If these are fine, the issue could be a faulty power switch or a blown thermal fuse within the Hoover itself – further investigation is needed.
Loss of Suction Issues
Reduced suction often indicates a blockage within the hose, wand, or dust container. Thoroughly inspect and clear any obstructions. A clogged filter is another common culprit; clean or replace it as needed. Check for leaks around seals and connections, as these diminish airflow and overall cleaning power.
Brush Roll Not Rotating
A non-rotating brush roll typically stems from a broken belt, tangled debris, or a faulty motor. First, disconnect power and inspect the belt for damage. Remove any hair or strings wrapped around the brush. If the belt is intact, test the motor for continuity; a replacement may be necessary.
Hoover Belt Replacement
Replacing a worn Hoover belt restores suction and brush roll function. Begin by disconnecting the cleaner from power. Access the brush roll compartment, usually on the underside. Remove the old, broken belt, noting its routing. Install the new belt, ensuring proper tension and alignment around the brush roll and motor shaft.
Locating and Removing the Old Belt
First, disconnect the Hoover from the power outlet for safety. Typically, access requires removing the bottom plate or a dedicated access panel. Locate the brush roll; the belt encircles it. Carefully cut the old belt with scissors or a utility knife if it’s severely damaged, then remove it completely.
Installing the New Hoover Belt
Stretch the new Hoover belt over the brush roll first, ensuring a snug fit around the entire circumference. Then, carefully maneuver the belt onto the motor shaft, applying even pressure. Double-check that the belt is properly seated in the grooves before reassembling the Hoover’s baseplate.
Hoover Filter Cleaning & Replacement
Maintaining clean filters is crucial for optimal suction and air quality. Regularly inspect your Hoover’s filters – HEPA, foam, or cloth – for debris. Cleaning involves gentle washing and thorough drying. Replacement is necessary when filters become damaged or excessively clogged, ensuring peak performance.
Types of Hoover Filters
Hoover vacuums utilize various filter types for effective cleaning. Common filters include washable foam filters for pre-motor protection, HEPA filters capturing microscopic allergens, and cloth filters offering basic filtration. Some models feature advanced multi-layer filters, enhancing air purification and extending motor life.
Cleaning vs. Replacing Filters
Determining whether to clean or replace a Hoover filter depends on the type and condition. Washable filters should be cleaned regularly, ensuring complete dryness before reinstallation. Disposable filters, like HEPA filters, must be replaced periodically – typically every 6-12 months – for optimal performance and air quality.
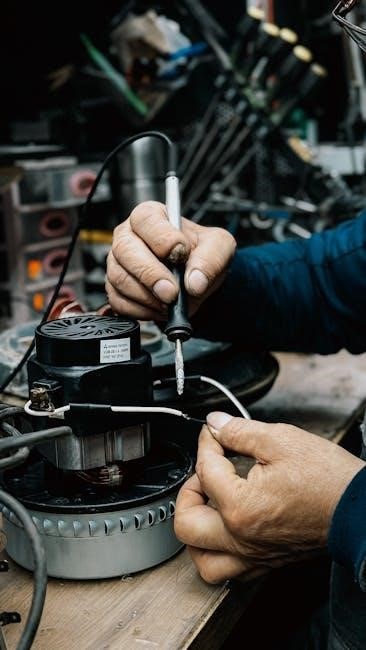
Motor Repair & Maintenance
Regular motor maintenance extends your Hoover’s lifespan. Inspecting motor brushes for wear is crucial; replace them when significantly shortened. Addressing motor bearing issues often requires specialized tools and expertise. Always disconnect power before any motor work, prioritizing safety during these essential repair procedures.
Checking Motor Brushes
Motor brushes facilitate electrical contact within the Hoover motor. Regularly inspect these brushes for length; typically, less than ¼ inch necessitates replacement. Accessing them usually involves removing the motor housing. Worn brushes cause sparking and reduced power, impacting cleaning performance. Replacement is a straightforward repair, restoring motor efficiency.
Motor Bearing Replacement
Worn motor bearings create excessive noise and vibration during Hoover operation. Replacement requires specialized tools for safe removal and installation. Carefully disassemble the motor, noting bearing orientation. Applying thermal paste during reassembly ensures smooth operation and extends bearing life. This repair restores quiet, efficient performance.
Hoover Hose & Wand Repair
Maintaining clear airways is crucial for suction power. This section details identifying and resolving blockages within the hose and wand. Cracks or punctures necessitate repair or replacement to prevent suction loss. Flexible hoses require careful inspection, while wands may need disassembly for thorough cleaning and optimal airflow.
Identifying Hose Blockages
Reduced suction often signals a hose blockage. Visually inspect the hose for visible obstructions. Detach the hose and shine a flashlight through it to pinpoint the clog’s location. Gently flex the hose to dislodge debris; avoid forceful poking. A straightened coat hanger can carefully extract stubborn blockages.
Repairing or Replacing Damaged Hoses
Minor cracks may be temporarily sealed with strong tape, but replacement is recommended for significant damage. Disconnect the hose from both the vacuum and attachments. Measure the hose diameter and length for accurate replacement. Online retailers and Hoover’s official site offer compatible hoses.
Hoover Power Cord Repair

Always unplug the vacuum before inspecting the power cord for frays, cuts, or exposed wires. If damage is found, replacement is crucial for safety. Obtain a cord specifically designed for Hoover vacuums, ensuring correct amperage and plug type. Follow wiring diagrams carefully during installation.
Inspecting for Damage
Begin by visually examining the entire cord length, looking for cracks, splits, or melted areas. Gently flex the cord while observing for internal wire breaks. Check the plug for loose connections or damaged prongs. A continuity test with a multimeter confirms internal wire integrity, ensuring safe operation.
Safe Power Cord Replacement Procedures
Always disconnect the Hoover from power before starting. Route the new cord identically to the old one, securing it with clamps. Ensure proper connections to the internal wiring, matching color codes. Thoroughly test the replacement cord for continuity and insulation before reassembling, prioritizing electrical safety.
Hoover Bagless System Maintenance
Regularly empty the dust container after each use, or when it reaches the “full” line. Wash the container and filters with water, ensuring they are completely dry before reassembly. Inspect the cyclone separator for blockages and clean thoroughly to maintain optimal suction power and performance.
Emptying and Cleaning Dust Containers
To empty, detach the dust container and dispose of debris appropriately. Rinse the container with cool water, removing any lingering dirt or dust. Allow it to air dry completely before reattaching to the Hoover. Regularly cleaning prevents clogs and ensures consistent suction, maximizing cleaning efficiency.
Cyclone Separator Maintenance
The cyclone separator efficiently removes larger debris before it reaches the filter. Periodically check and remove any accumulated dust or blockages within the cyclone chamber. A clean cyclone ensures optimal airflow and prevents suction loss. Regular maintenance extends the life of your Hoover and maintains peak performance.
Hoover Upright vs. Canister Repair Differences
Upright Hoovers often present challenges with brush roll and belt access, requiring more disassembly. Canister models typically involve hose, wand, and motor component repairs. Diagnosing uprights focuses on the powerhead, while canisters emphasize airflow and suction pathway issues. Both require careful attention to electrical connections.
Unique Challenges of Upright Repairs
Upright Hoover repairs frequently involve intricate brush roll mechanisms, demanding precise belt replacement and motor alignment. Accessing internal components often necessitates extensive disassembly, potentially leading to lost parts or damaged housings. Diagnosing powerhead failures requires specialized testing, and uprights are prone to clogging.
Specific Considerations for Canister Models
Canister Hoover repairs often center around hose and wand functionality, requiring careful inspection for blockages or cracks. Motor access is typically easier, but intricate wiring within the canister body demands caution. Cyclone separation systems need regular cleaning, and wheel/caster repairs are common.
Finding Hoover Parts & Diagrams
Locating replacement parts is crucial for successful Hoover repair. Numerous online retailers specialize in vacuum parts, offering a wide selection. Hoover’s official website provides detailed parts diagrams and lists, aiding accurate identification. Utilizing model numbers ensures compatibility, streamlining the ordering process and minimizing errors.

Online Parts Retailers
Several online retailers specialize in Hoover vacuum parts, offering convenience and competitive pricing. Websites like Amazon, eBay, and dedicated vacuum parts stores provide extensive catalogs. Always verify the retailer’s reputation and return policy before purchasing. Cross-referencing part numbers with your Hoover model is essential for ensuring compatibility and a successful repair.
Utilizing Hoover’s Official Resources
Hoover’s official website is a valuable resource for repair information, including downloadable manuals, parts diagrams, and troubleshooting guides. Registering your Hoover often unlocks access to exclusive support and warranty details. Contacting Hoover’s customer service directly can provide personalized assistance and clarify specific repair challenges for your model.
Advanced Troubleshooting Techniques
For complex issues, a multimeter is essential for electrical testing, verifying voltage and continuity within the Hoover’s circuits. Diagnosing motor problems requires assessing winding resistance and brush condition. Carefully examine the wiring harness for breaks or shorts, and utilize diagrams to trace circuits effectively.
Using a Multimeter for Electrical Testing
Safely disconnect the Hoover from power before testing. Set the multimeter to measure voltage, checking for proper power supply to the motor and controls. Use continuity mode to identify broken wires or faulty switches. Resistance measurements help assess motor winding health, indicating potential shorts or opens.
Diagnosing Complex Motor Issues
Complex motor problems often require advanced testing. Check for carbon buildup on the commutator, impacting brush contact. Inspect bearings for wear, causing noise and drag. A multimeter can reveal winding shorts or open circuits. If issues persist, consider professional motor rewinding or replacement for optimal performance.
Regular maintenance extends your Hoover’s lifespan. Consistent filter cleaning and belt checks prevent performance decline. Promptly address issues like suction loss or unusual noises. Utilize this manual for self-repair, saving costs and ensuring optimal cleaning power. A well-maintained Hoover delivers years of reliable service!