Winnebago Wiring Schematic PDF Free: A Comprehensive Guide
Unlock your Winnebago’s electrical mysteries! This guide details accessing free PDF schematics, installation, and troubleshooting, ensuring a smooth RV experience for all owners․
Understanding Winnebago Electrical Systems
Winnebago RVs employ a dual-voltage electrical architecture, featuring both 12V DC and 120V AC systems․ The 12V DC side powers essential functions like lights, water pumps, and propane detectors, drawing energy from the house batteries, often charged by the engine alternator or a converter․ Conversely, the 120V AC system, similar to a household setup, operates appliances like air conditioners, microwaves, and televisions, requiring a shore power connection or a generator․
Understanding this separation is crucial for diagnostics․ Winnebago utilizes a complex network of wiring, fusing, and control modules․ Accessing a detailed wiring schematic is paramount for safely identifying components and tracing circuits․ Ignoring proper procedures can lead to system failures or, more seriously, electrical hazards․ Familiarizing yourself with these systems empowers you to perform basic maintenance and confidently address electrical issues․
Why You Need a Wiring Schematic
A Winnebago wiring schematic is indispensable for any electrical work, from simple repairs to complex system upgrades․ Attempting to diagnose or fix issues without one is akin to navigating a maze blindfolded – time-consuming and potentially dangerous․ Schematics provide a visual roadmap of the entire electrical system, detailing wire colors, component locations, and circuit pathways․
They are vital for identifying the root cause of electrical faults, preventing further damage, and ensuring safe repairs․ A schematic allows you to accurately trace circuits, locate blown fuses, and understand how different components interact․ Furthermore, when modifying or adding to the existing system, a schematic ensures compatibility and avoids unintended consequences, safeguarding your investment and peace of mind․
Common Winnebago Models & Schematic Availability
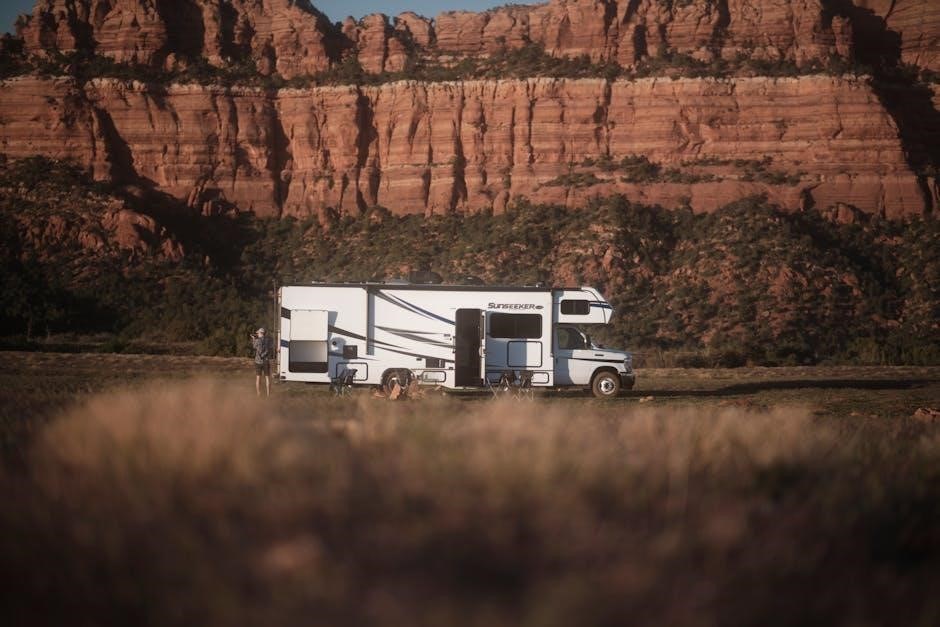
Winnebago manufactures a diverse range of RVs, and schematic availability varies by model and year․ Popular lines like the Adventurer, Journey, and Vista/Navion generally have more readily accessible diagrams compared to older or less common models․ Finding a free PDF schematic can sometimes be challenging, requiring diligent searching across various online resources․
Generally, newer models (within the last 10-15 years) have a higher probability of having digital schematics available online․ Older models may require contacting Winnebago directly or relying on scanned copies shared within RV enthusiast communities․ Knowing your RV’s specific year and model is crucial for a successful search, streamlining the process and increasing your chances of finding the correct diagram․
Schematics for Winnebago Adventurer

Winnebago Adventurer schematics are frequently sought after due to the model’s popularity․ Owners often find PDFs detailing the 12V and 120V systems, including lighting, appliances, and the house battery setup․ Resources like RV forums often host user-uploaded schematics for specific Adventurer years, offering a valuable community-driven solution․
However, complete, official schematics can be harder to locate for free․ Many available diagrams are partial or require registration on certain RV parts websites․ Searching with the specific year of your Adventurer is vital; for example, “2018 Winnebago Adventurer wiring diagram PDF” yields more targeted results․ Expect to encounter both basic and more detailed schematics depending on the source․
Schematics for Winnebago Journey
Finding wiring diagrams for the Winnebago Journey can present a slight challenge, as it’s a higher-end model with potentially more complex electrical systems․ Free PDF schematics are available, but often scattered across various online platforms․ RV owner forums are a prime starting point, with members frequently sharing diagrams they’ve acquired or created․
Journey models, particularly those with advanced features like residential refrigerators or extensive entertainment systems, require detailed schematics for effective troubleshooting․ Searching with the year and specific features (e․g․, “2020 Winnebago Journey with Aqua-Hot wiring diagram”) will refine your search․ Be prepared to potentially combine information from multiple sources to create a comprehensive overview․
Schematics for Winnebago Vista/Navion
Winnebago Vista and Navion models, built on Mercedes-Benz Sprinter chassis, introduce a unique layer of complexity to wiring diagrams․ Finding free PDF schematics requires understanding both the Winnebago house systems and the Sprinter chassis electrical components․ Dedicated Sprinter forums are invaluable resources, alongside standard RV communities․
Due to the integration of the Sprinter’s electrical system, schematics often need to be viewed in conjunction․ Look for diagrams specifically detailing the connection points between the chassis and the Winnebago living area․ Searching for diagrams by year and model (e․g․, “2018 Winnebago Navion wiring”) is crucial for accuracy․ Expect to find separate diagrams for 12V and 120V systems․
Where to Find Free Winnebago Wiring Schematics Online
Locating free Winnebago wiring schematics demands a multi-pronged approach․ Start with Winnebago’s official website; their owner resources section sometimes provides limited schematics or links to helpful documentation․ However, comprehensive diagrams are often elusive directly from the manufacturer․
RV forums, like iRV2 and Winnebago Owners, are goldmines․ Members frequently share scanned schematics or links to downloadable PDFs․ Utilize the forum’s search function diligently, specifying your model year․ Third-party RV parts and service websites, such as RV Parts Country, occasionally offer schematics as supplemental material with purchases or as free downloads․
Winnebago’s Official Website & Owner Resources
Winnebago’s official website (winnebago․com) serves as a primary, though often limited, resource for wiring information․ Navigate to the “Owner Resources” section, typically accessible through the support or service areas of the site․ Here, you might find basic wiring diagrams, component lists, or links to external documentation relevant to your specific Winnebago model and year․
Registration is often required to access these resources․ While complete, detailed schematics aren’t always freely available, Winnebago frequently provides helpful guides and troubleshooting tips․ Check for downloadable PDF manuals that may contain partial wiring information․ Remember to have your Vehicle Identification Number (VIN) handy, as it’s often needed to pinpoint the correct documentation for your RV․
RV Forums and Online Communities
RV forums and online communities represent a valuable, often free, source for Winnebago wiring schematics․ Websites like iRV2․com, and dedicated Winnebago owner groups on Facebook, frequently host threads where members share scanned copies of diagrams or links to downloadable PDFs․ These communities thrive on shared knowledge and collaborative problem-solving․

Searching within these forums using specific keywords – your Winnebago model, year, and “wiring schematic” – is crucial․ Be prepared to register for an account to access all content․ Remember to verify the accuracy of any schematic found online, as user-submitted information isn’t always guaranteed to be correct․ Contributing to the community by sharing your own findings is also encouraged!
Third-Party RV Parts & Service Websites
Numerous third-party RV parts and service websites often provide access to Winnebago wiring schematics, sometimes as a complimentary resource to encourage purchases․ Companies specializing in RV electrical components, like RV Parts Country or Camping World, may host downloadable PDFs within their support sections or product listings․ These schematics are frequently linked to specific parts or repair guides․
However, availability can vary significantly․ Some websites require account creation or a small fee to access the diagrams․ Always double-check the schematic’s compatibility with your exact Winnebago model and year before relying on it for repairs․ These resources can be incredibly helpful, but verifying the information’s accuracy remains essential for safe and effective electrical work․
Decoding a Winnebago Wiring Diagram
Successfully navigating a Winnebago wiring diagram requires understanding its core elements․ These diagrams aren’t simply a jumble of lines; they’re a logical representation of the RV’s electrical system․ Key components are depicted using standardized symbols, representing fuses, switches, lights, and appliances․ Color-coding is often employed to differentiate between various circuits, like 12V DC and 120V AC․
Learning to interpret these symbols and trace the flow of electricity is crucial․ Begin by identifying the power source (battery or shore power) and follow the lines to understand how electricity reaches each component․ Pay close attention to ground connections, indicated by specific symbols, as they are vital for circuit completion and safety․
Understanding Symbols and Conventions
Winnebago wiring diagrams utilize standardized symbols to represent electrical components․ A straight line signifies a wire, while a curved line denotes a ground connection․ Resistors are often depicted as zig-zag lines, capacitors as parallel lines, and fuses as boxes with a break in the line․ Switches are shown in their open or closed states, indicating whether the circuit is active or inactive․
Conventions include using different line thicknesses to represent wire gauges and color-coding to distinguish between voltage levels․ Commonly, black indicates hot wires, white neutral wires, and green or bare copper signifies ground․ Understanding these conventions is paramount for accurately interpreting the schematic and performing safe electrical work on your RV;
Tracing Circuits: 12V DC Systems
Begin tracing 12V DC circuits from the power source – typically the house batteries or a converter․ Follow the schematic, noting each component the wire connects to: lights, water pump, furnace fan, and slide-out motors․ Pay close attention to fuses and circuit breakers; these protect the system and pinpoint faults quickly․
Use a multimeter to verify voltage at each connection point, ensuring power is reaching the intended device․ Look for breaks in the wire, loose connections, or corroded terminals․ Remember that Winnebago often uses inline fuses for specific components․ Accurate tracing requires careful attention to detail and a systematic approach, following the diagram meticulously․
Tracing Circuits: 120V AC Systems
Start tracing 120V AC circuits at the main electrical panel, identifying breakers for outlets, the air conditioner, microwave, and refrigerator․ Remember that these systems require extreme caution due to the higher voltage․ Utilize the wiring schematic to understand the path of each circuit, noting any split receptacles or dedicated lines․

Employ a non-contact voltage tester to confirm power is present before working on any wiring․ Inspect for loose connections, damaged wiring, or overloaded circuits․ Winnebago often uses GFCI (Ground Fault Circuit Interrupter) outlets for safety in wet areas․ Always disconnect power at the breaker before attempting any repairs, and double-check with your tester․

Troubleshooting with a Wiring Schematic
Employing a Winnebago wiring schematic dramatically simplifies troubleshooting electrical issues․ Begin by identifying the affected component and locating its corresponding circuit on the diagram․ Systematically trace the circuit path, checking for breaks, shorts, or loose connections․ Utilize a multimeter to verify voltage and continuity at various points․
If a circuit lacks power, investigate the breaker, fuses, and wiring connections․ For intermittent problems, carefully examine connectors and grounds․ Remember to consult the schematic for specific component wiring details․ A clear understanding of the diagram allows for efficient diagnosis and repair, saving time and frustration during RV maintenance․
Essential Tools for RV Electrical Work
Successfully tackling RV electrical repairs requires a specific toolkit; A digital multimeter is paramount for voltage, continuity, and resistance testing․ Wire strippers and crimpers ensure secure connections, while assorted wire connectors are crucial for repairs․ Consider a circuit tester to quickly identify live wires and faulty outlets․
Additionally, a fuse puller, screwdriver set, and pliers are indispensable․ For more complex tasks, a wire tracing kit can be invaluable․ Don’t forget safety glasses and insulated gloves to protect against electrical shock․ Investing in quality tools enhances efficiency and safety during all electrical work on your Winnebago․
Safety Precautions When Working with RV Wiring
Prioritize safety when dealing with RV electrical systems! Always disconnect the power source – both 120V AC and 12V DC – before commencing any work․ Utilize insulated tools to minimize the risk of electrical shock․ Never work with wet hands or in damp conditions, as water conducts electricity․
Wear safety glasses to protect your eyes from sparks or debris․ If unsure about any aspect of the wiring, consult a qualified RV electrician․ Double-check all connections before restoring power․ Proper grounding is essential for preventing shocks and protecting appliances․ Remember, electrical safety is paramount for a worry-free RV experience;
Specific Winnebago System Schematics
Delving into specific systems requires focused diagrams․ Water pump schematics illustrate wiring for the pump motor, switches, and related plumbing sensors․ Generator diagrams detail the generator’s connection to the transfer switch, shore power inlet, and main distribution panel․ Slide-out wiring showcases the complex circuitry controlling motors, sensors, and leveling systems․
Accessing these individual schematics often involves searching model-specific forums or Winnebago’s owner resources․ Understanding these focused diagrams simplifies troubleshooting and repair․ Remember to cross-reference with the overall wiring schematic for a complete picture․ Detailed system knowledge empowers confident RV maintenance and upgrades․
Water Pump Wiring Diagrams
Winnebago water pump diagrams typically showcase the 12V DC wiring powering the pump motor․ Key components include the pump itself, an inline fuse for protection, a pressure switch controlling operation based on water demand, and the corresponding wiring to the RV’s 12V distribution panel․ Schematics often illustrate the ground connection and any additional features like a pump run switch․
Troubleshooting often begins with verifying power reaches the pump and the pressure switch functions correctly․ Diagrams aid in tracing wiring faults and identifying blown fuses․ Understanding the pressure switch’s wiring is crucial for diagnosing pump cycling issues․ Always disconnect power before working on the water pump system for safety․
Generator Wiring Diagrams
Winnebago generator wiring schematics detail the connection between the generator, the transfer switch, and the RV’s electrical panel․ These diagrams illustrate both 120V AC and 12V DC circuits, including starter wiring and charging lines for the house batteries․ Key elements include the generator’s output breakers, the transfer switch’s configuration for selecting shore power or generator power, and the wiring to various AC loads․
Troubleshooting generator issues often involves checking the transfer switch operation and verifying proper voltage output․ Schematics help trace wiring faults and identify tripped breakers․ Understanding the charging circuit is vital for ensuring batteries receive a charge while the generator runs․ Remember to disconnect power before any electrical work․
Slide-Out Wiring Diagrams
Winnebago slide-out wiring diagrams focus on the electrical components powering the slide-out mechanisms – motors, sensors, and control modules․ These schematics illustrate the wiring from the RV’s power center to the slide-out’s control panel, detailing the connections for extending and retracting the slides․ Important components include the slide-out room control system (SRCS), limit switches, and the motor’s power and control wiring․
Troubleshooting slide-out issues often involves checking the SRCS for error codes and verifying power to the motor․ Schematics aid in tracing wiring faults and identifying faulty sensors or control modules․ Understanding the wiring allows for safe and effective repairs․ Always disconnect power before working on slide-out electrical systems․